Wednesday, February 25, 2009

Goodie Giveaway...

Wanna win these goodies?
Photobucket
double-sided papers
Photobucket

One winner will be randomly selected in a drawing. You can get your name in the pot up to 4 times. Here's how:
1)leave a comment on this post.
2)post about my site on your blog and include my link in the post.
3)become a follower of my blog. (click on the link in the right sidebar)
4)add my button to your sidebar.
*In your comment please list which entries you completed (you can complete one or allof them) and if you already have my button on your blog or you are already a follower of my blog just include that in your comment.

Deadline to enter: Monday, March 2, 2009
Announcement of the winner will be Wednesday, March 4, 2009

Thanks and good luck!

Tuesday, February 24, 2009

The Perfect "Pear"

Photobucket

The papers I used for this layout are from the Designer Series Paper - Good Morning Sunshine.
Photobucket
I have to admit this paper set is probably my favorite in the catalog this time. It has it all...birds, owls, and pears. Plus, I love the colors... Kiwi Kiss, Pacific Blue, Summer Sun and Chocolate Chip. And it coordinates with the So Tweet chipboard which I used on this layout.
Photobucket
So Tweet includes 6 sheets of 9” x 9” chipboard with 11 designs (8 of each piece) for 88 pieces total!

I also used another one of my FAVORITE things in the catalog - the Top Note Die used with the Sizzix Big Shot. I like it so much I used 2 on this layout!
PhotobucketPhotobucket

The rub-on I used came from the Greatest Moments rub-on set.
Photobucket


Punches used-
I used lots of punches...I used the tiniest little hearts from the Heart to Heart punch on the chipboard pears. I used the Scallop edge punch along the top and bottom. I used the Slit punch down the sides of the yellow cardstock creating a larger scallop edge. I used a corner rounder on the brown paper.

Stamps used-
I used the large rectangle from Frames with a Flourish to frame the pears. I used the background stamp, Polka Dot, to add a little depth to the chocolate chip cardstock.

Journaling-
He's calm, I overreact. I get things done while he procrastinates. He's optimistic and the glass if half empty for me. I have a plan, he goes with the flow. Together we have balance making us the perfect "pear."
Photobucket

Tonight or tomorrow I will be posting info about winning a prize so check back soon!

To learn more about or order the products I used just click on the highlighted words to visit my online Stampin' Up store.
Thanks for stopping by!

Friday, February 13, 2009

There's Just Something About a Man in Uniform...

especially a brown UPS uniform and your waiting for your order from Stampin' Up to arrive!

Yep, got lots of goodies today and still a box on it's way! I'm not sure where I'm going to put it all but I'm alright with that!
I'll be posting pics of my spoils later.
I hope everyone enjoys their Valentine weekend!

Wednesday, February 11, 2009

I am teaching my stamp club group how to make this cute stationary box next Friday.
Kim found this idea here - Stationary Box. Here's how my trail run turned out.
Photobucket
Photobucket
Photobucket
I used the scraps left over from creating the box to make the note cards and tags. I used two 12"x12" white cardstock and one 12"x12" designer paper to make everything. Plus the ribbon, stamps, and ink, of course.
When you slide off the lid the front flap opens up to reveal a place for a pen, postage stamps, a notepad, 4"x6" cards and envelopes, 3"x3" note cards, and tags. What a great way to store everything you need to send a quick note all in one place!
I used the Delightful Dots designer series paper, the Polka Dot Punches stamp set, and the ribbon bundle from the Sale-a-bration catalog. I also used the Cheep Talk stamp set for one of the note cards.
Photobucket
Click here for more details about this stamp set.
This would also make a really great gift. I think I'm going to make my mom and grandmother each one for Mother's Day.

I have 4, yes, FOUR boxes of supplies on there way to my house! They are supposed to arrive on Friday. Friday the 13th must be my lucky day! I'll be a stamping and scrapping fool once my goodies make themselves at home on my scrap desk.

Saturday, February 7, 2009

Two More Cards...

I made these cards as a "thank you" to 2 of my customers who are holding a catalog party through me. I hope they enjoy them.

I used the Delicate Dots Designer Series Paper, the stamp set Polka Dot Punches, and the Certainly Celery ribbon that you can receive free for a limited time during the Sale-a-bration on this card.
Photobucket

Photobucket
On this card, I used one of my favorite new sets, Cheep Talk. The bird is so cute! And it matches the chipboard So Tweet and the Good Morning Sunshine paper pack. Love it all! Check them out here:
Cheep Talk
So Tweet
Good Morning Sunshine
I'm really fond of the colors in the Delicate Dots paper you can earn during the Sale-a-bration. The colors just scream SPRING! Making my case of spring fever even more unbearable, lol. I'm really being drawn to these papers and colors, so I used more of the Delicate Dots paper on this card. I stamped the adorable bird exclaiming my thanks in So Saffron. Then I made a tiny little dot with my Stampin' Write marker in Bashful Blue for the eye. I colored the tree branch stamp with my Stampin' Write markers in Close to Cocoa and the leaves in Certainly Celery.
I just have to take a second to share how much I LOVE my Stampin' Write Markers!! I purchased them over 5 years ago and they still work perfectly. I was not able to afford each color Stampin' ink pad so I went ahead and bought the entire Stampin' Write Markers set including every color. It is the best purchase I've made as far as stamping tools go. It seriously opened the doors to my creativity! Before I had the markers I was very limited with the few ink pads I had. Using the markers brush tip gives me the ability to stamp in any color I need, and I'm able to write my journaling or add detail with the writing tip matching or coordinating with any of the papers. It really is awesome! If you would like to be able to expand your stamping color choices you should definitely check out these markers (click here!)

Right now I'm working on a gift box to hold a few goodies to send off to the hostesses of the catalog parties. I'll post those soon.

Remember, even if you don't live close enough to have me come demonstrate in your home, you can always host a catalog party and still earn all the hostess benefits (click here to read more about hostess benefits)! Right now during the Sale-a-bration you can earn even more great goodies by hosting a party, plus your friends get to earn free stuff too! Just contact me through my Stampin' Up! website (click here) and I'll get all you need mailed out asap!

I hope you are enjoying your weekend!

Thursday, February 5, 2009

Hi There!

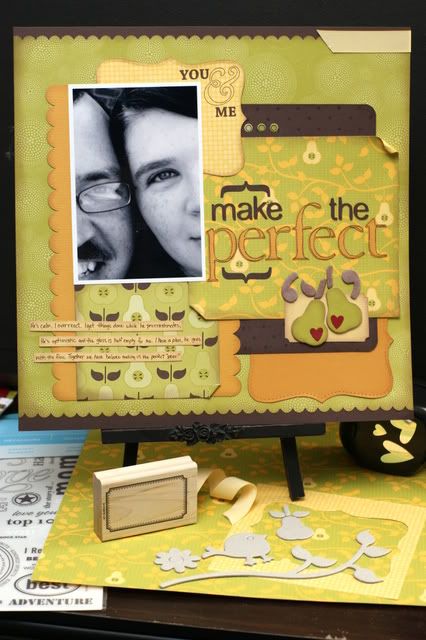
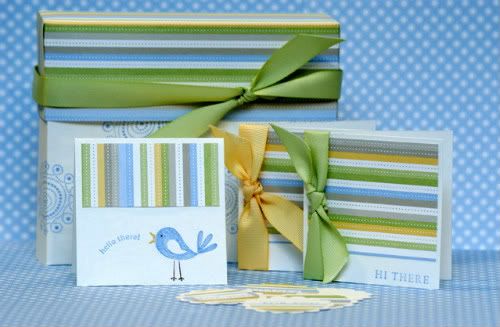
Here's my first card as a Stampin' Up! demonstrator.
Photobucket

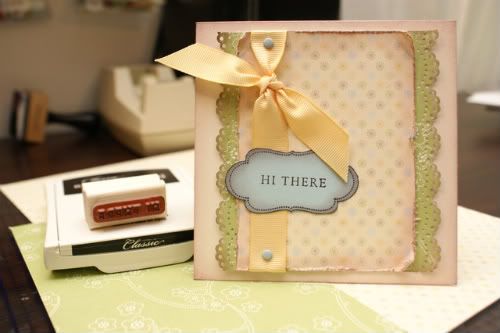
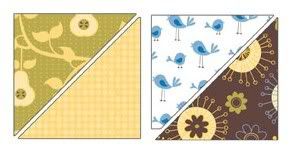
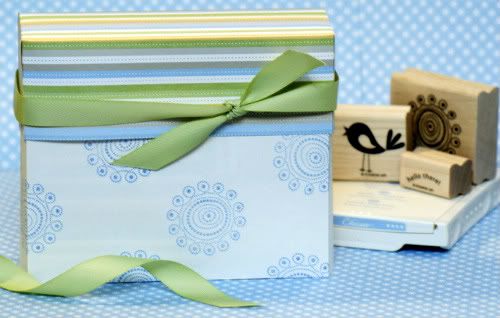
One thing I learned...I need a Stamp-a-ma-jig...I could not get the words straight! I tried 3 times and this was the best I could get, lol. Anyway, check out the cute paper I used! I just love blue and green. I often refer to them as "my colors." The paper is from the package you can receive free during the Sale-a-bration (
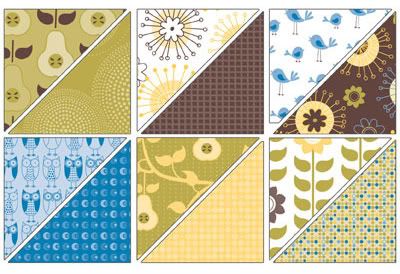
click here for details.) Spend $50 and choose this set of 16 sheets of double-sided paper (4 each of 4 designs.) Colors that coordinate with this paper are Certainly Celery, So Saffron, Bashful Blue, and Sahara Sand. The So Saffron ribbon can also be earned during the Sale-a-bration. You can receive a ribbon bundle pack including 10 yards (5/8" wide) of both So Saffron and Certainly Celery. The So Saffron is grosgrain and Certain Celery is poly- twill. The label "Hi There" is stamped on is one of my favs. That comes from an awesome stamp set Frames with Flourish (click here to check it out.)

Ok, here's how it's done...
1)Cut Very Vanilla 9 1/2" x 4 3/4"
2)Fold in half like a hamburger creating a 4 3/4" square
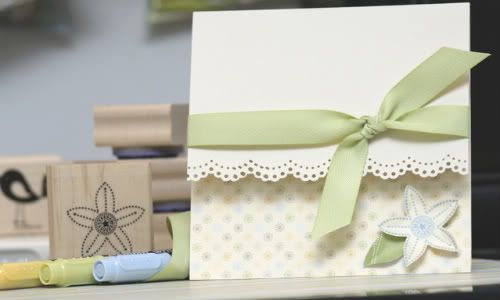
3)Cut green Delicate Dots Designer Series Paper 4 1/2" x 4 1/4"
4)Punch down the shortest sides. (I used a punch I had lying around but I suggest using Stampin' Up's new Eyelet edge punch -click here to have a look- you're gonna love it! I ordered mine yesterday and can't wait to get my hands on it.)
5)Cut the multi colored dot Delicate Dots Designer Series Paper 3 1/4" x 4 1/4"
(If you want a shabby chic look, use an edge distressor or scissors to roughen up the edges.)
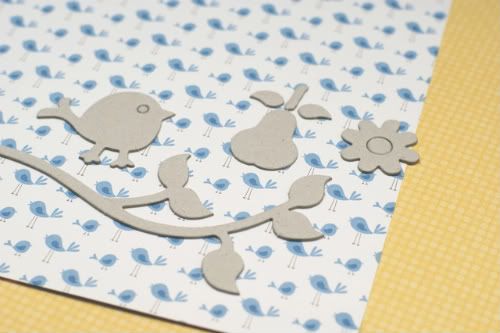
6)Stamp the label image on Bashful Blue cardstock and cut out
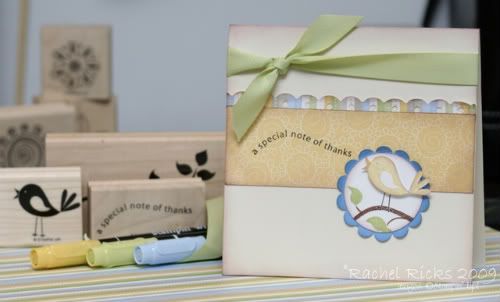
7)Stamp a sentiment from Fundamental Phrases (click here to see the set) In the center and straight if you are any better at it than I am, lol.
8)Use a sponge dauber and ink the edges of everything with Close to Cocoa
9)Attach the dotted paper to the green scallop edge paper
10)Tie a length of So Saffron ribbon around the left side of the dotted paper and attach a small Bashful Blue brad at the top and bottom edges
11)Attach label (I also curled up the corners of the dotted paper and curled up the scallops to finish off the shabby chic look.)
All done! So cute!

Remember the items you receive during Sale-a-bration are only offered until the end of March and will not be offered again. Don't miss out! Click here to read the details or click on the mini catalog cover in the left sidebar to see all the wonderful items you can earn!
And don't forget, right now you will receive a free Idea Book/Catalog with ANY online purchase. So go on over to the sidebar and click on the cute shopping button (or click here) and get yourself something fun.

I'm still waiting on a package from Stampin' Up! As soon as it arrives be on the look out for an awesome goodie give away!

Until next time,

LinkWithin

Related Posts with Thumbnails
Disclaimer: The content in this blog is the sole responsibility of Rachel Ricks as an independent Stampin' Up! demonstrator and the use of and content of classes, services or products offered is not endorsed by Stampin' Up!

All content, including text, photographs, and concept design works, are ©Rachel Ricks. They are shared for personal/ non-commercial use and inspiration only.

Blog header and logo design © Rachel Ricks.

flash backs