Tuesday, October 13, 2009

Looking Sweet

Sorry, it looks like Monday Make & Take is going to be late again! I had a sick little one all weekend and today I'm getting things ready for our Stamp Club Meeting this evening. I am working on something cool to share for the make and take though so check back later this week!

You may have noticed I changed some things on the blog other than just the new look. You can click on the buttons below the header to take you different places on the blog. You can now search the blog in the search box on the left. You can search for certain Stampin' Up products to see how I've used them or you can search project types, like basket, and you'll see all the posts that included basket in the text. Pretty cool! I've also updated my blog button. It's a little further down on the left if you'd like to grab it and share it on your blog.

Since I'm not ready to share the make and take I thought I would at least share something for you to look at while you wait.
Photobucket
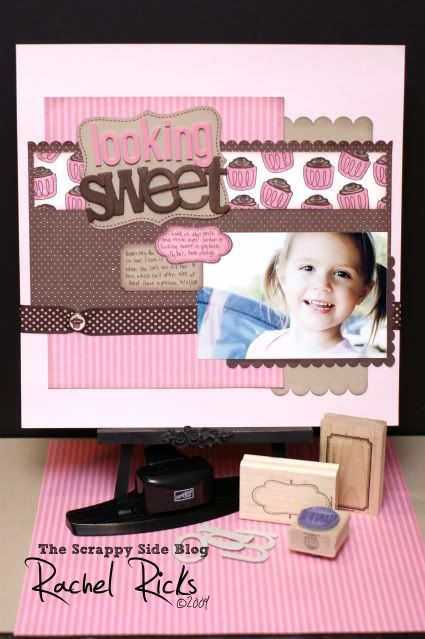
This is one of my all time favorite photos of my youngest. I may be biased, but she sure looks sweet in pig tails.

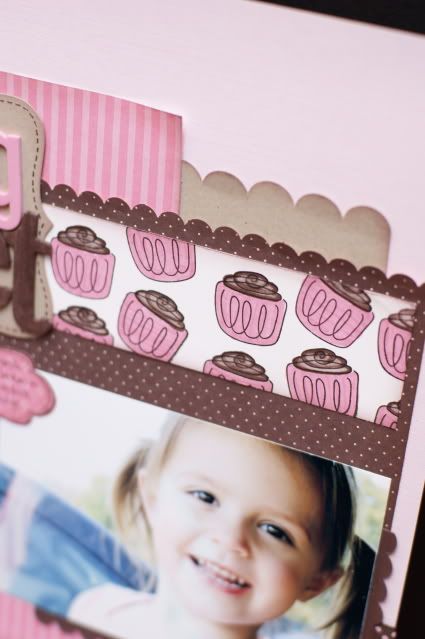
The paper with the cupcakes I made myself! The first time I've ever used paper I stamped myself, so I'm pretty excited. I stamped the cupcake from the hostess stamp set in the last catalog called It's a Loop Thing in a triangle pattern turning the stamp each time. Then I colored them in with Stampin' Write markers and Blender pens.
Photobucket

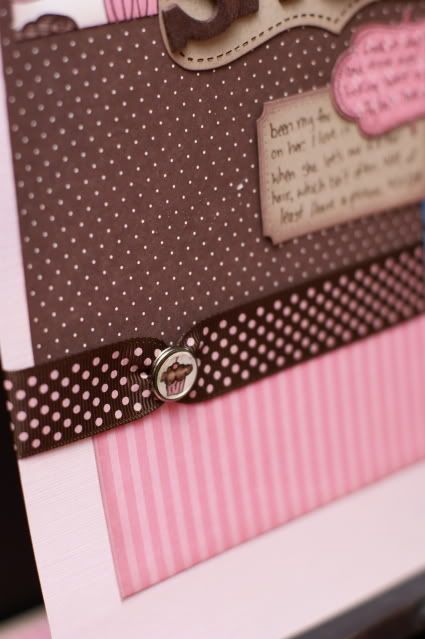
I created a custom brad using the Build-a-Brads and the cupcake from the Short & Sweet stamp set.
Photobucket

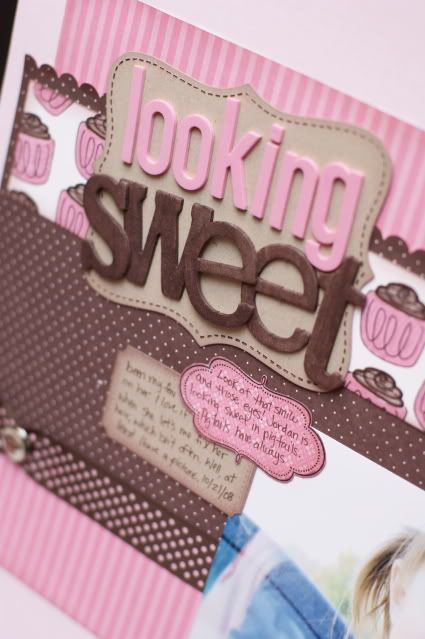
For the title I used pink foam letters and Stampin' Up's chipboard letters from On Board Loads of Letters.
Photobucket

Stampin' Up items used to create this layout :

Paper
Regal Rose stripe - Rock-a-Bye Girl Scrappin' kit (retired)
Chocolate Chip polka dot - Bella Rose (retired)
Pink Pirouette (retired)
Kraft
Whisper White

Chipboard
Loads of Letters #112084

Stamps
Short & Sweet #115060
Frames with a Flourish (retired but you can now purchase the digital stamp to print and use)

Die Cuts
Top Note #113463

Punches
Slit punch #104388
1/2 Circle punch (center of Build-a Brad) #104390
Scallop Edge punch #112091

Embellishments
Build-a-Brad Pewter #109128

Remember you can email me to order these items or if you have a question about any Stampin' Up products. I'm here to help.

Non Stampin' Up Items
pink foam letters
brown polka dot ribbon

Thanks for stopping by. Have a wonderful week!

Saturday, June 20, 2009

Rise To The Challenge Week 2

This week's requirements:

1. 28 or 82 embellishments of your choice. (must list out) No more no less.
2. Your LO must be of a "summer" theme
3. Your technique to use this week is sanding (cause playing in the sand is summery)
4. Must use the colors Blue(color of water) , Orange (color of the summer sun), and Brown (color of the sandy beaches).

I ended up with 21.17 points out of 25 possible points.

Photobucket

I sanded on the letter stickers, hello sticker, the heart sticker, the edges of the middle photo and the edges of the blue paper.

My 28 embellishments:

1-brown scallop at top corner
9-stitches (counted each stitch)
1-blue spot for journaling the date
1-yellow brad
7-"explore" counted each letter
1-journal notebook paper
1-square pp
1-brown photo corner
1-frog
1-yellow artisan shape
1-heart
1-"hello" sticker
1-orange edge strip
1-brown scallop strip

28-total

I did not count plain paper as embellishments. So the red background and the blue cs weren't embellishments.


Paper and Cardstock

I used Red Riding Hood Red as the background paper.
I also used Chocolate Chip, Bashful Blue, and Pumpkin Pie.
The square pattern paper is from the Washington Apple paper pack (112461).
The notebook paper is from Hand Drawn Designer Series Paper you can only get with the Hand Drawn Bundle as a level 3 hostess set.

Photobucket

The frog, title letters, heart, and hello stickers are all from the Simply Scrappin' Kit Hoppy Memories (113936).


Punches

I do love punches!

I used the Slit punch(104388) to create the large scallop strips.
On the Pumpkin Pie paper I used the 1/2 inch punch(104390) to create the fun edge then traced it with the matching Stampin' Write marker.
I used the Curly Label punch(112966) and tucked it behind the photo on the right.
I created a photo corner using the Scallop Square punch(112081).
The notebook paper was created using the Spiral punch (108341)across the top and then I rounded the bottom corners using a corner rounder(109047).

Photobucket

Stamps

I used the rectangle frame from Frames with a Flourish set(113496) at the top of the page. I'm sad to see this set go!

Photobucket

The next challenge is all about journaling. We need to include raw, moving journaling.

Additional Requirements:
1. Use some sort if office supplies
2. Use some household item to Stamp with {ie: lids, sponge, etc.} skies the limit.
3. Technique - Distressing can be any kind of distressing - List all/any you use

I haven't had time to even start on this yet and it is dues Tuesday!! Wish me luck.

LinkWithin

Related Posts with Thumbnails
Disclaimer: The content in this blog is the sole responsibility of Rachel Ricks as an independent Stampin' Up! demonstrator and the use of and content of classes, services or products offered is not endorsed by Stampin' Up!

All content, including text, photographs, and concept design works, are ©Rachel Ricks. They are shared for personal/ non-commercial use and inspiration only.

Blog header and logo design © Rachel Ricks.

flash backs