Monday, April 9, 2012

Another Set of Cool Moving Cards!

Here's the third set of cards I made for the awesome UStamp with Dawn and Friends event going on now!
The award on the DAD card is a real award that Dad can wear on Father's Day! The graduation cap card pops up and has a spot for a gift card!
How fun it that! To get the tutorial come join us for the Card with Cool Moves event at UStamp with Dawn and Friends!

Thanks so much for stopping by!

Monday, October 17, 2011

A Tisket, A Tasket, A Fallish Kind Of Basket

I saw a cute basket decorated for fall and thought, "I bet I can make one out of paper!" So I gave it a try and this is what I came up with.


This week's challenge at Hand Stamped Sentiments is to use the shaving cream technique, crayons, or pastel chalks.


I rarely use my chalks, but I thought they would be perfect for coloring my leaves to make them look all fallish. I love how it all turned out! It is just the right size to hold an apple with a side of caramel dip. Very fallish!


So glad I was pushed by the challenge this week to dig out my pastels. I'll have to keep them out on the craft desk to use them more often.

Thanks for stopping by for a visit!
I hope you head over to Hand Stamped Sentiments this week to play along with the challenge.

Photobucket

Friday, September 23, 2011

{Impress}ive Technique

I found this impressive technique over on splitcoaststampers.com. I think it is called crayon rubbed embossing. Super easy with really cool results. All you do is lay your cardstock on the raised part of your embossing folder and frimly rub a white crayon over your cardstock. Then rub the ink over the cardstock and crayon marks resist the ink leaving a design. Get it, {impress}ive?

I created this polka dot paper using the Perfect Polka Dot embossing folder and Daffodil Delight ink. I love how it turned out! I'm excited to know I can make whatever colored polka dot paper I need to match my projects!
This is one of the tags from the Two Tags die. You just fold on the crease, wrap it around a small candy bar (like the little Hershey bar I have wrapped up here but something like Laffy Taffy would work as well), and you have a cute little package.
I wanted to try a different embossing folders to see how it looked so I grabbed my Square Lattice embossing folder. I used Tangerine Tango ink this time. What a neat look! It looks very worn, but it is smooth to the touch.
This is the other tag from the Two Tags die. I cut two, then scored them at one inch on the bottom, and attached them together to create another little treat holder.
A couple of Hershey's nuggets fit inside perfectly.


After I made these I found out that Hand Stamped Sentiments was having a technique challenge using an embossing folder, embossing powder, or a letterpress plate, create any card or 3D project. Perfect. So I linked over there. You should go over and play along, too.

Thanks for stopping by for a visit at the little blue room!

Tuesday, August 2, 2011

Stamp Club Creation July

Photobucket

Again I was inspired by another project from Erica over on Pink Buckaroo Designs.
Photobucket

She shared this idea as a teacher appreciation idea. I thought it would be fun to decorate your crafting scissors or coupon cutting scissors, too.

My stamp club ladies loved the idea because the project was so quick and easy with an awesome result. Personally decorated scissors. Too cool! I now want to do this to every pair of scissors I see!

All you have to do is
  • cut a piece of patterned paper to fit over the blade
  • glue to the blade using Crystal Effects
  • sand around the edges to give it a nice finished look
  • cover with a layer of Crystal Effects
  • let dry
I made my set to match the little blue room.
Photobucket

The pens are even easier to make.
  • unscrew the end of an RSVP pen
  • cut a piece of patterned paper long enough to fit inside the casing and wide enough to wrap around the ink tube inside
  • roll the patterned paper into a tube and slide it into the pen casing
  • screw the end back on
Here's a coupon clipping kit I put together real quick. Seriously, it took like 5 minutes to make. It takes the Crystal Effects longer to dry than it takes to put the kit together. I used the same process used to cover the scissors on the circle latch that the elastic wraps around to add a little flair to the coupon holder and to make it all matchy-matchy.
Photobucket
The scissors are just the right size to slide into the holder so I can always find my scissors when I'm ready to start clipping.

I mentioned in my last post that the real life little blue room is getting a makeover soon. I've been searching the web for great room layout ideas and clever storage ideas. If you've found something that works for you or you hope to implement into your craft room someday please add the link. I'd appreciate more inspiration as I plan out the new and improved little blue room. You can leave a link below. Thanks!


Photobucket

Wednesday, July 27, 2011

Wow...Time Really Does Fly!

I didn't realize it had been so long since I've shared on here until I received an email from a sweet lady letting me know how much she enjoys my blog and she closed the email with "let me know if you decide to continue your blog." I was like, what? I'm still blogging! Then I went to my blog and noticed I had not blogged in more than two months. Wow...time really does fly! Thank you, Keren, for your email and I'm so glad you found my blog and took the time to send me an email. You can visit Keren's blog with wonderful Stampin' Up ideas here > Stampin' Journey of an Everyday Crafter.

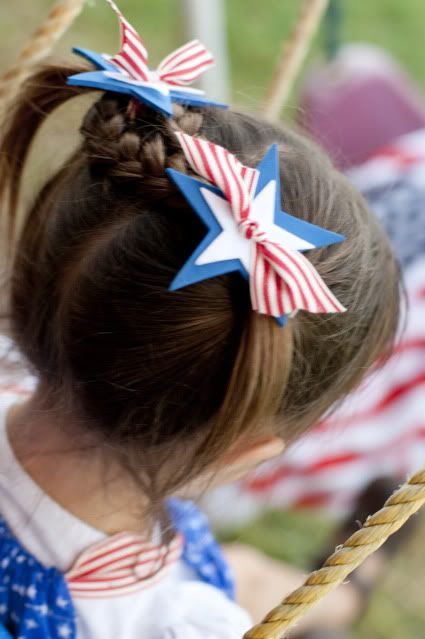
We've been busy with lots of summer fun these past two months. We went the pool ALOT. I helped with a craft at Cub Scout Day Camp. I was able to go to our church girls youth camp for a week. I made my youngest daughter a bandana stars and stripes top using some of my favorite striped ribbon from Stampin' Up.
Photobucket

Oh, and these hair things too. I used the Big Shot to cut the blue and white stars out of foam. Then, punched a hole in the center with the Crop-a-dile. To finish it off I tied the stars to the braids with the striped ribbon.
Photobucket

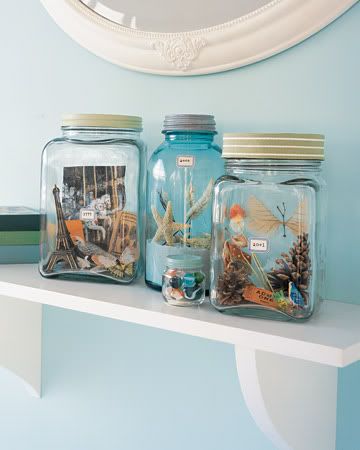
Last summer I was inspired by these memory jars. I added them to my ever growing to-do list but, never got around to making any. Don't you love those vinyl words on the jars?
Photobucket

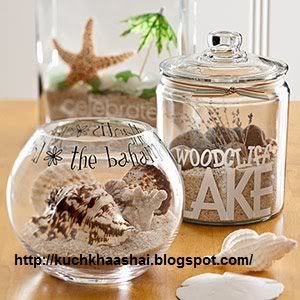
These are from Martha Stewart.
Photobucket

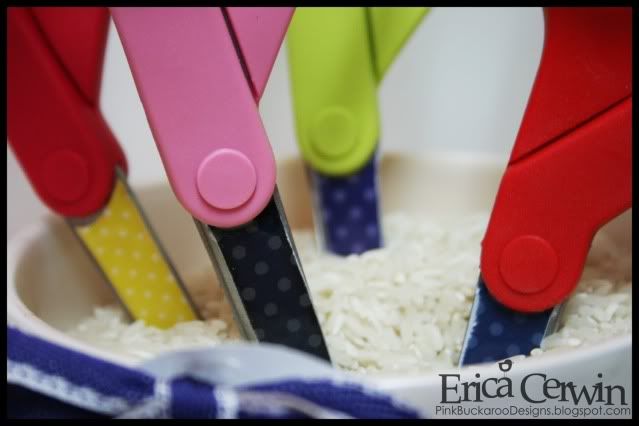
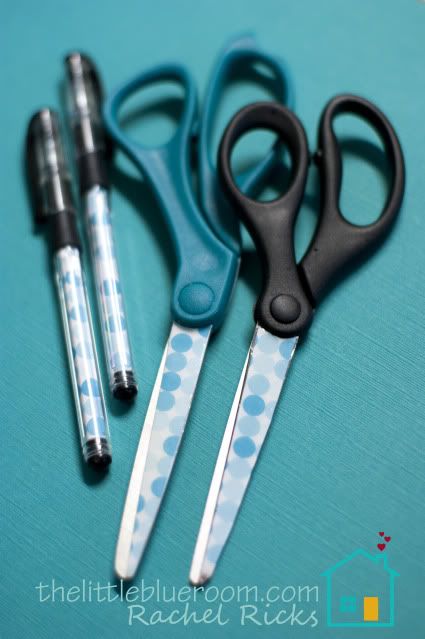
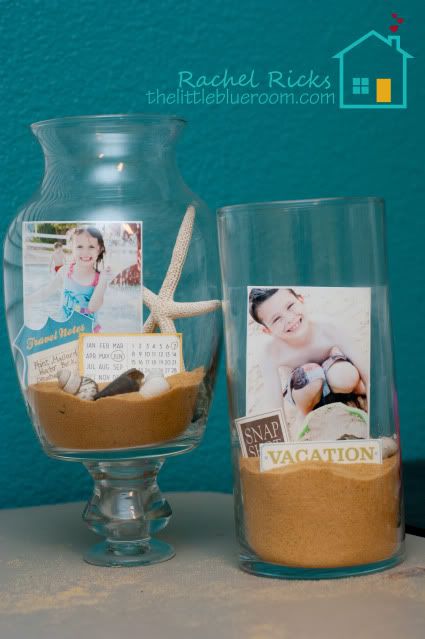
When I saw this project on Erica's blog it was the kick in the pants I needed to go try making my own.
 Photobucket


So, this was our Stamp Club creation in June.
Photobucket
I used a Stampin' Up digital kit to print out the embellishments we used in our project.
Photobucket
Just $9.95. With digital you can print as many as you need and in any size you want, over and over again! So, I decided on the size I wanted for this project and printed them out on Whisper White Cardstock. Then, we simply cut out the embellishments and added them to our memory jars.

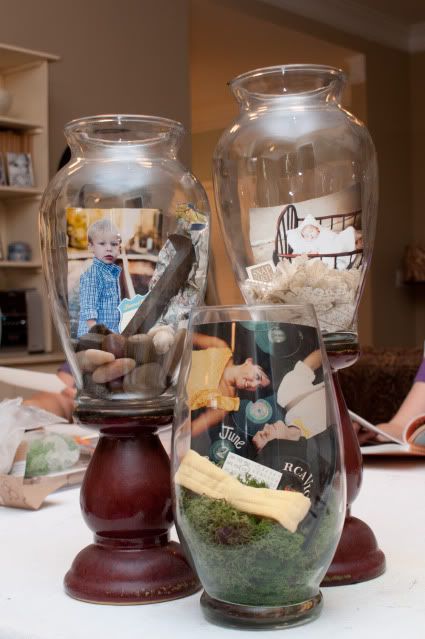
This is a collection of photo jars Amy made to display at her photography studio. I love how they turned out and how they demonstrate using different themes, not just beach.
Photobucket

Stamp Club for July is tomorrow night! I hope to post our club creation soon.

Well, there you go, a little catchin' up on the blog. Things will probably be slow for another month or so as the real life little blue room is being rearranged and redecorated in August. I am SO excited! I've been sketching ideas and measuring things and hanging out on pinterest.com gathering lots of inspiration. Thanks for being patient with me. I should be back to sharing on a regular basis after school starts.

I hope you are all having a wonderful summer!

Photobucket

Monday, May 23, 2011

Bloomin' Cute Candy Bouquet

It has been a long time. Some of my followers and fans may not know that I live in the areas effected by the recent tornadoes on April 27th. My famlily and I were lucky, the tornado went past our house by about a mile. My husband and I watched it pass by from our upstairs window. Our area has so much damage. It is heartbreaking just to drive to the grocery store and pass the neighborhoods and buildings that are now just piles of debris. So, there has been lots going on to take me away from the little blue room for a while.
With this month coming to an end I needed to have our Stamp Club meeting. I sat down in the little blue room to come up with an idea for a project this month. I had heard of candy bouquets but, to be honest, it sounded a little cheesey to me. I know, I know, shame on me for judging. I'm glad that it was the only project coming to mind. I had just ordered the Blossom Party original die for my big shot and this project gave me an excuse to break it in.
Photobucket
My original thought was to use Dum-Dum suckers because they are smaller, but I could not find them anywhere. Finally I found mini suckers and they are just the right size. I was planning on just making sucker blooms, then Pixy Stix came to mind as taller stemmed flowers. So, I jumped in the car and went to the store just for Pixy Stix! I'm crazy like that.
When I started making the blooms I only used two layers of flowers and it was looking very flat...and cheesey, oh no! So, I cut more and crunched and crinkled and layered and I started loving it.
Photobucket
Photobucket
Then I needed something to put the bouquet in and remembered using this watering can template from Splitcoast Stampers a while back. Perfect. What a sweet little gift for birthday, thank you, or any time!
Photobucket
I'm so glad I gave this idea a try because I love how it turned out! Looking forward to sharing it with my Stamp Club ladies tomorrow night.

Hope you are having a great day, even if it is a Monday. Thanks for stopping by the little blue room!

Photobucket

Tuesday, April 12, 2011

Bunny Bag

Stamp Club is this Thursday. We will be making this cute little bunny bag. Perfect for giving Easter treats.

Photobucket

Every bunny needs a fluffy tail.

Photobucket


Spring is Blossoming Promotion: April 1 - 30, 2011

The Stampin' Up! Spring is Blossoming Promotion offers customers the opportunity to purchase two sneak peek products from the upcoming 2011-2012 Idea Book & Catalog.


Photobucket

Photobucket

You can get these brand-new products in one of two ways:
•Spend $20* on any Stampin' Up! products and become eligible to purchase both the Four Frames Set and Paisley Petals Designer Series Paper.

•Both items can be purchased once the $20 minimum is met; there is a limit of five per product once the $20 minimum is met. Ordering another $20 of Stampin' Up! products resets the limit and allows you to purchase another five Designer Series Papers and/or stamp sets.

•Host a $350* workshop and get the Four Frames Set and Paisley Petals Designer Series Paper for FREE!

•There is a limit of one Four Frames Set and Paisley Petals Designer Series Paper per workshop.

*Net sales before tax and shipping


Thanks for hopping by. Haha.

Photobucket

Tuesday, March 22, 2011

Burlap Love

I have a thing for burlap and I must have it bad, my last post was about burlap! :)
As I was trying to plan my upcoming Stamp Club projects I came across a card that had cardstock embossed with the Stampin' Up! Square Lattice embossing folder. Then the recent banner I made for my sister Amy (Amy Boston Photography) came to mind. Bam, idea! Faux Burlap Banner! The only problem, I didn't have that embossing folder yet. I had to wait DAYS with this idea floating around in my head but, not able to actually create it. Drove me crazy! I was thrilled when I pulled into my driveway and Stampin' Up! boxes where waiting for me. Look! My embossing folder wanted to play, too. Hahaha.
Photobucket

I was worried that my idea wouldn't turn out as great as I had imagined but after cutting and embossing I was already head over heels. Look at that yummy texture!
Photobucket

I made a few 3D paper flowers, cut some things with the Big Shot, and added just a few spring touches.
Photobucket

My favorite part is the "frayed" edges. Such a wonderful detail!
Photobucket

Photobucket

Photobucket

The paper really has a look and feel similar to burlap. Love it!

Super excited to share this my Stamp Club ladies this Thursday, then I will share how-to's with you!

Thanks for stopping in for a visit at the little blue room.

Photobucket

Thursday, March 3, 2011

Faux Turquoise Tutorial

Hello, blog friends! This post has been sitting on my computer since Monday. I love the technique but, I am not thrilled with my video. I do not like hearing my voice. The lighting is horrible because I recorded at night. It seemed like a good idea since the little ones were in bed and it was quiet. Today I decided I am still going to share the video with you because watching the shrinking process is the best part and I am really excited to share this technique with you. So, here it is...flaws and all.
Wait, here's a pretty picture first to help me feel better about my ugly video. :) I attached a faux turquoise bird charm to a wood pendant to add to a necklace. My sister, Amy, took apart an old bracelet and designed the earrings. I just love them! She was nice enough to share her copper circles with all of us at Stamp Club. (Thanks, girl!)
Photobucket
{I feel better now. Thanks!}

(Not sure about the volume settings so you may need to turn it up or down on your computer. I'm new to this, I don't know.)


Watching it shrink is awesome, right? I freaked the first time it curled up! I discovered as you keep heating it, it will flatten back out when it is finished.

We had a wonderful time at Stamp Club making all kinds of jewelry. I like to think we kicked shrinky dink up a notch!
Here are a few photos and other ideas for other shrink film jewelry items from my sister Amy. I forgot to bring my camera that night so she took a few photos of what she created afterwards. Thanks for the pictures! (Check out her beautiful photography on her photography blog here).
Photobucket
Photobucket
Photobucket

Thanks for stopping by and checking out my first video tutorial. So, what did you think? You going to give shrink film a try?

*Edited to add the tutorial using You Tube so those using an Iphone (like me) can view the video.*


Who's ready for the weekend? I'm hoping I can get a few crafts checked off the "I wish I had time to do" list.
Happy Crafting!

Linking to:


Photobucket

Wednesday, February 16, 2011

What To Do at Stamp Club? {Edited to add another photo}

So I am trying to decide on what project to do this month with my Stamp Club group. Here's an idea using shrink plastic to create personalized charms. For my practice test I created this for my sister-in-law. I had a tiny heart on top but my little ring was too small and it wouldn't fit. It is SO awesome to watch it shrink!! Still figuring out what works well on the shrink plastic and what doesn't. I think I will try sanding it slightly and spraying a clear coat to smooth it out and make it shine.
Here I am wearing it. Wow! Try to look past the freckles. :)
Photobucket
{To show the size I included a dime in the photo.}
Photobucket
So, what do you think? Something you would be interested in learning?
More ideas using this shrinky stuff coming soon but for now, playtime over, I need to clean house!

Hope you are having a happy Wednesday.

Photobucket

LinkWithin

Related Posts with Thumbnails
Disclaimer: The content in this blog is the sole responsibility of Rachel Ricks as an independent Stampin' Up! demonstrator and the use of and content of classes, services or products offered is not endorsed by Stampin' Up!

All content, including text, photographs, and concept design works, are ©Rachel Ricks. They are shared for personal/ non-commercial use and inspiration only.

Blog header and logo design © Rachel Ricks.

flash backs