I always have so much fun decorating for Halloween. This year I came across this idea from Martha Stewart {click here} and just had to make one. I looked at the instructions and thought of all the random items in the garage I could use to make this project. I had pieces of left over MDF, black paint, and other items from a project I finished earlier that week that could be used to create my witch, so I was determined to make it myself and only using the items I had in my garage. The most difficult part of the project was trying to cleverly use the items I already had. If you just head to the hardware store and buy the wood and other supplies this project can be done in an afternoon.
Step one:
Print out the template found here > witch template. Spray the board with repositional spray adhesive and lay out the template following the guide numbers. I didn't even cut around the template. I just stuck it all down. I really liked using the repositional adhesive spray to just stick down the template you are going to cut. That really is a time saver!
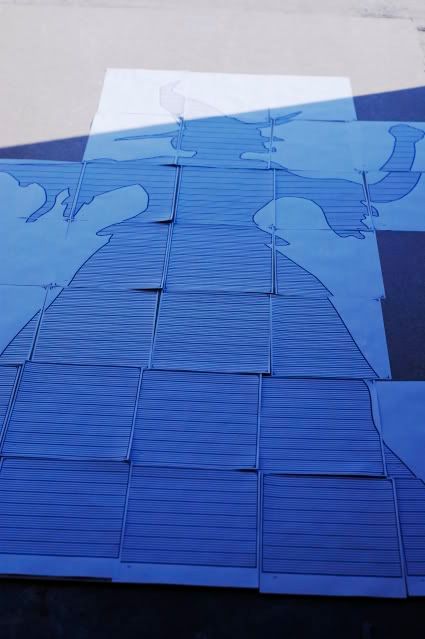
You can just cut out the pattern lay it out and trace it, if you don't want to buy repositional spray adhesive. The repositional spray adhesive is a little pricey at around $7 a can, but I used a 40% off coupon to cut the cost. I did learn from a mistake...don't get carried away spraying the adhesive on...too much makes it too sticky and the paper doesn't want to peel off. I finally got the paper off but it left residue squares from the paper that still show up when you look closely. So all you need is a light spray of the adhesive.
Step two:
Using a jigsaw cut the template following the outline.
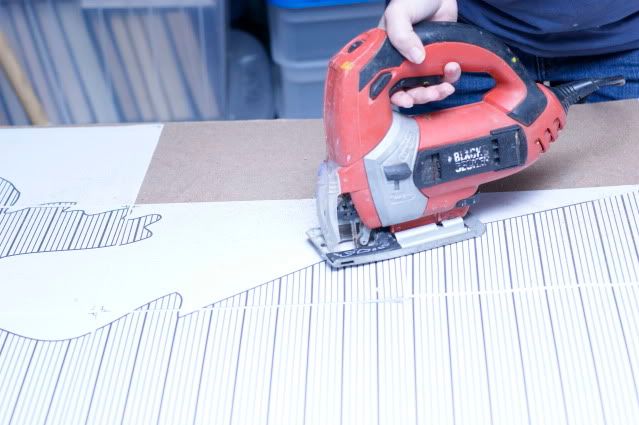
I suggest starting at the bottom of the dress. Because it was my first time using a jigsaw, it gave me time to get used to how the jigsaw felt and worked before I needed to cut out detailed parts of the face and sleeves. I was so worried I was going to cut the face wrong and have to start all over. I just went super slow and it was fine. I didn't follow all of the lines perfectly, but I never messed up so badly that I couldn't just cut back to the outline and keep going. So don't freak out on little mistakes, no one will notice when you are finished. 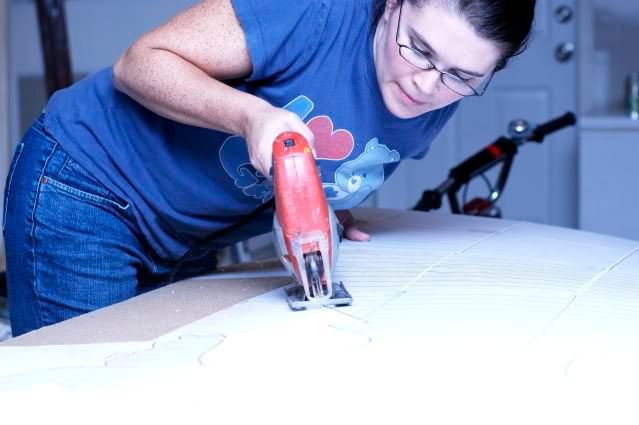
Step three:
Peel off the template and paint her black. I had a little black spray paint so I sprayed the edges and the back then used some left over satin black paint on the front. I set her out over night and did not like how shiny she was because you could see every flaw. No woman likes to show off her flaws so I grabbed some leftover black chalkboard paint to give her a flat finish. I like her much better.
Step four:
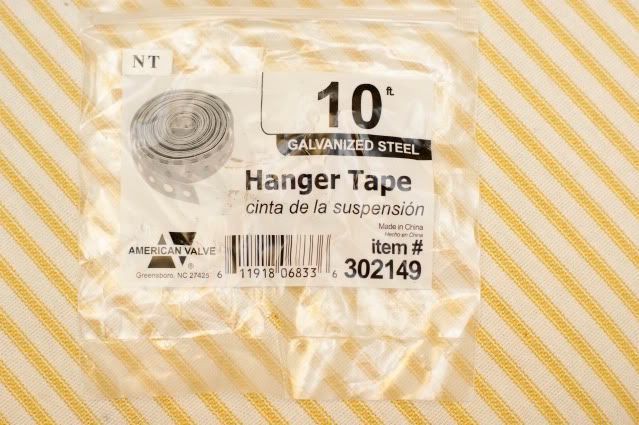
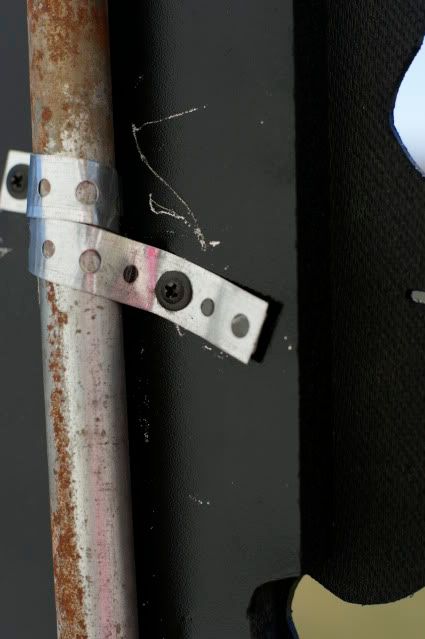
Hammer the support pole into the ground about 12 inches. I used old tent poles that we had in our "take to the dump" pile. The one time I'm happy my husband had not taken the pile to the dump yet, lol. Then attach the witch to the pole. I used strips of hanger tape. It seems to be holding just fine so far.
Step five:
Attach the accessories. I found my lantern at a thrift store for only 55 cents. I added a screw on the back of her hand and hung the lantern from it. Then I found an old cinnamon scented broom at a thrift store. I cut off the broom end and attached it to a large stick I picked up on the side of the road. I attached the broom the same way I attached the pole.
So the total cost for me to make my witch was less than $3 because of the supplies I already had on hand!
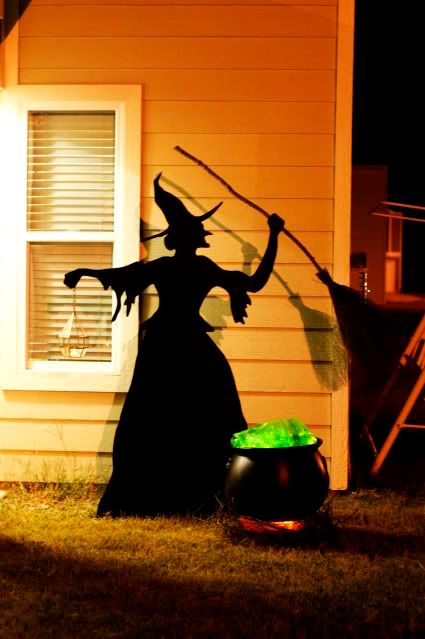
I finished the scene with a cauldron over a fire. I used a pile of sticks I found on the side of the road to make my fire pit. I wired the sticks together to make a circle. Then I used a glass bowl wrapped in a yellow plastic table cloth and orange sparkle tulle with an orange strobe light to create my glowing flickering fire. I found the cauldron at Party City and lined it with foil. Then I placed white Christmas lights in the bottom and stuffed it with green cellophane, also from Party City. I hope to buy a smoke machine for next year so the cauldron can have a smoking glowing brew, but for this year, I think she is wicked cool!

Disclaimer: The content in this blog is the sole responsibility of Rachel Ricks as an independent Stampin' Up! demonstrator and the use of and content of classes, services or products offered is not endorsed by Stampin' Up!
All content, including text, photographs, and concept design works, are ©Rachel Ricks. They are shared for personal/ non-commercial use and inspiration only.
Blog header and logo design © Rachel Ricks.

3 comments:
You did an amazing job...I plan on making my witch tomorrow...I hope she turns out just as nice as yours...Happy Halloween !! c
Fabulous job, Rachel! I'd be thrilled if you shared this over at my halloween link party at http://igottacreate.blogspot.com !
Beetay Huwe Dinon Ko Bhulaya Nahi JataJo Roo Rahay Hon Unko Rulaya Nahi JataHasnay Walon Ko Rulana Aasan HaiLekin Ronay Walon Ko Kabhi Hasaya Nahi JataApno ,play bazaar Or Geroon Ko Bhulana Asaan ideas satta king Hai LekinDil Todnay Walay Ko Bhulaya Nahi JataUmeed Ban Ke Log Zindagi Mai Atey HainKhawab Ben Ke Ankhon Mai Sama Jate Hain.
Post a Comment