Friday, July 31, 2009

Sales Tax Holiday!!

The state of Alabama is having a sales tax holiday from August 7 – 9. Because school supply items are included in this sales tax holiday, the below list of items will be tax free during the holiday period. Please note that you must place your order with Stampin’ Up! during the tax holiday period in order to receive these items tax free.

Uni-ball Signo gel pen, 105021, $3.95
Basic Black Stampin’ Write journaler, 105394, $3.25
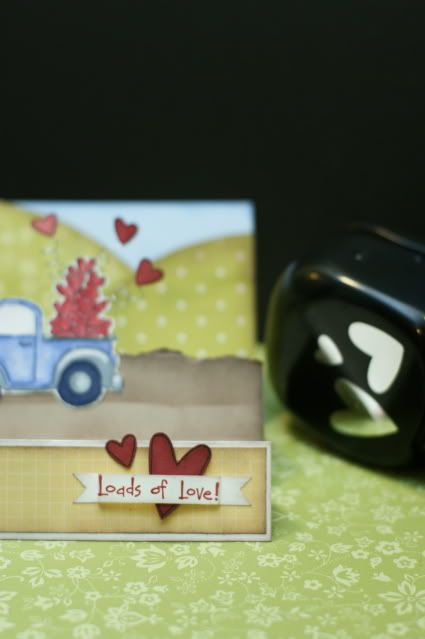
Stampin’ Write markers, various, $3.25
Watercolor Pencils, 101879, $19.95
Watercolor Wonder Crayons Bold Brights, 106695, $19.95
Watercolor Wonder Crayons Earth Elements, 106696, $19.95
Watercolor Wonder Crayons Rich Regals, 106698, $19.95
Watercolor Wonder Crayons Soft Subtles, 106697, $19.95
Watercolor Wonder Crayons Neutrals, 106746, $9.95
Stampin’ Pastels, 105542, $24.95
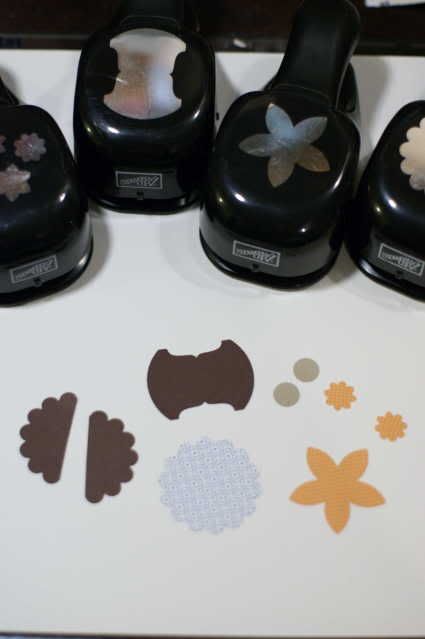
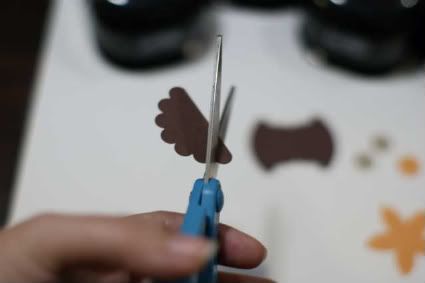
Craft & Rubber scissors, 103179, $19.95
Paper snips, 103579, $9.95
Craft & Paper scissors, 108360, $29.95
Pencil sharpener, 100745, $4.95
Blender pens, 102845, $9.95
2-Way Glue Pen, 100425, $3.50
SNAIL adhesive, 104332, $6.95
SNAIL refill, 104331, $4.50
Mini Glue Dots, 103683, $4.95
Pop-Up Glue Dots, 104183, $3.95
Stampin’ Dimensionals, 104430, $3.95
Anywhere Glue Stick, 104045, $3.95
Dotto, 103305, $12.95
Dotto refill, 100902, $6.50
Sticky Strip, 104294, $6.95
Tombow Adhesive, 110755, $3.95


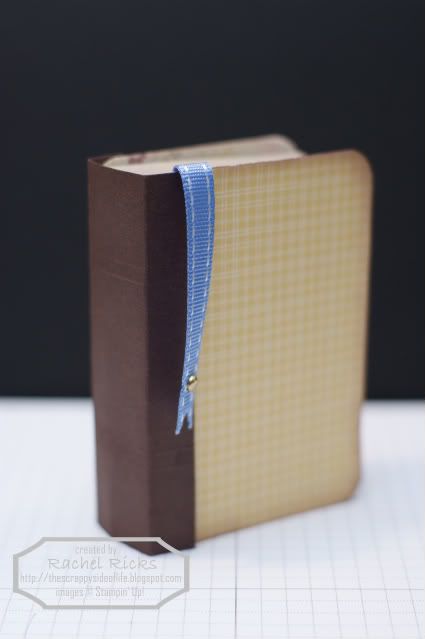
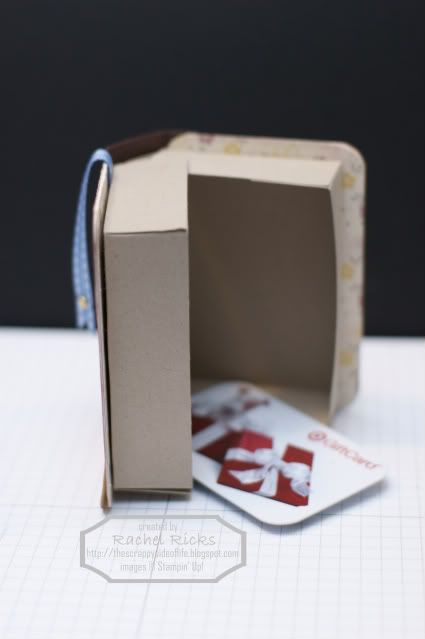
If you are here in Alabama contact me ASAP if you would like to order any of the items on this list tax free and I'll place the orders on the 9th.

Monday, July 27, 2009

Make & Take Monday

I usually don't make many cards but the stair step cards really caught my eye. I love the layers.

Photobucket

Stair Step Card
1) Cut your cardstock to the size of 10.5 X 5.0 If you plan to stamp your background, now would be the time to do it. I did not stamp on this one.
2) Score your cardstock at 1.25" - 2.5" - 4.25", 6" and at 8.25"
3) Fold accordion style making sure that the smallest (1.25" fold) is folded down, as this will be the front of your card.
4) Now here's the fun part...DECORATE... use punches, die cuts, stickers...whatever, just have fun with it!
Since this is my first one I kept the decorating simple.

I made the back panel taller than the last panel usually is and attached it to create a background scene. It isn't necessary but I liked it on this.
I used Kraft cardstock as the road.
I used the Loads of Love stamp set(item #115033) for the truck and filled the back with a load of hearts.

Photobucket

Photobucket

I also used the Heart to Heart punch(item #133694) which is on sale this week for only $10.99 instead of $15.95. What a great deal!

Here I used the smallest hearts and attached them with a drop of Crystal Effects(item #101055) to the wire.

Photobucket

I also used the largest heart and a tiny heart around the sentiment.

Photobucket

This was easy and fun to create. I look forwad to making more scenes with other stamps sets and themes. This would even make a cute photo card adding the photo to the last panel.

I hope you enjoyed the make and take today. If you have any questions let me know, I'm happy to help. I promise to be better and actually get these posted earlier in the day on Mondays. Our kids start back to school in 2 weeks so after they start back I should have more time to get things posted.

I'd love to see your stair step cards. To share them with us include a link to a photo of your card in the comments.

I hope everyone has a wonderful week.

Oops, just realized I didn't take a photo of the card folded together. I'll have to take a photo tomorrow and share it with you. :)

Deal of the Week

This is the final deal of the week through Stampin' Up!
This week you can purchase the Heart to Heart punch(item #113694) for only $10.99!
Photobucket
I love this punch and use it all of the time.
My favorite things about this punch is it punches 3 different size hearts with one punch and the smallest heart is just the right size to fit onto the Build-a-Brads.
Here's a few examples where I've used these perfectly punched hearts.


Photobucket

Photobucket

Photobucket

This deal only lasts a week! Email me if you'd like to take advantage of this deal.

Friday, July 24, 2009

Stamp Club July

Since school starts in just a few weeks I thought a school theme for our projects would be fun.

Photobucket

We made a backpack, tiny clipboard, book box, and bookmark.

Photobucket
Photobucket

I also handed out a Student Survival Kit print out to use if they wanted.

Student Survival Kit
Pen/Pencil – choose the “write” even if it isn’t the easy choice.
Eraser - remember you can always correct your mistakes.
Hugs – for those rough days when you really could use a hug.
Glue stick – stick to your goals and you can accomplish anything.
Gum – “chews” good friends, it can make all the difference.

You could fill the backpack with any "survival kit."
A smore's kit or trail mix would be cute with a camping theme.
It would make a super cute teacher giftbag or to hold a gift card and a few goodies for a kid heading off to college.
You could decorate this fun little backpack with just about any theme.

I made the backpack template just wide enough to fit our tiny clipboard.

Photobucket

This cute little book box is the perfect size for a giftcard and a few treats.

Photobucket
Photobucket

You could fit a small gift inside such as the bookmark we made.

Photobucket

We had a wonderful time at our Stamp Club. We laughed the whole time. It's great. If you are interested in joining our stamp club send me an email and I'll get you all the details.

Hope you have a great weekend.

Monday, July 20, 2009

Make & Take Monday

OWL-fully cute owl.

You will need:
Round Tab punch #108340
Scallop Circle punch #109043
Boho Blossoms #110711
5-Petal punch #109041
1/2" Circle punch #104390
Scissors
paper scraps of your choice
brads (optional)
Photobucket
Punch with the Round Tab punch and Scallop Circle punch in Chocolate Chip cardstock.
Punch with the Scallop Circle punch in pattern paper of your choice.
Punch with the 5-Petal punch and Boho Blossoms punch in orange cardstock.
Punch with the 1/2" Circle punch in Kraft cardstock twice.

Cut the brown scallop circle in half, then starting in between the last two scallops cut a curve to the top. Do this on the other half as well.
Photobucket

Attach them to the scallop punched in pattern paper.
Photobucket

Attach the punched Round Tab to the top of the scallops creating the head.
Photobucket

Cut one of the 5 petals from the punched 5-Petal flower. Attach it to the center bottom of the Round Tab to create the beak.
Photobucket
Photobucket

Attach the two 1/2" circles above the beak for eyes.
Photobucket
Attach the 2 blossoms from the punched Boho Blossoms with only 3 petals showing to create little owl feet.

Photobucket
I inked the edges of all my pieces with Basic Black ink and added 2 black brads to the centers of the eyes.

OWL-fully cute, right?

You can add this cute little guy to a card or scrapbook page.

If you make one of these little guys I'd love to see it! Just add a link to a photo of your owl in the comments.

Hope you enjoyed this Monday's make and take though technically Monday ended about 15 minutes ago for me. Oops! :)

Wednesday, July 15, 2009

Wish List Wednesday

Welcome to Wish List Wednesday. On Wednesdays I'll be sharing with you a few items from my wish list and why I need them.

On to my list...

The new Lattice die (item # 115958) to use with the Big Shot.
Photobucket
Stampin’ Up!’s exclusive Lattice Bigz die create delicate designs from any card stock, Designer Series paper, or other material. Use the Lattice design as an elegant overlay or a focal piece on your project. This Lattice die was designed as a repeatable image, allowing you to create beautiful designs on larger projects as well.
■ Can cut through multiple sheets of card stock, Texture Cuts wood sheets, window sheets, Décor Elements sheets, and more
■ Use with Sizzix Big Shot machine and standard cutting pads G281

I love that you can make your own lacey paper to add to cards, scrapbook pages, or other crafty projects. You can fold your paper into fourths and run it through not cutting on the folds and you can create a larger 6.5" square lacey lattice sheet to use on your scrapbook pages.

Wood Sheets (item #116309)
Photobucket
These sheets of ultra-thin birch add a refreshing and unusual texture to your projects. They're made of real wood that's thin enough to cut with the Big Shot or our Craft & Rubber scissors.
■ Very thin birch with paper backing
■ Four sheets of 5-3/4" x 13-3/4" wood
■ Can be stamped or heat embossed

Ok, cool! REAL wood to cut and stamp and use on my scrapbook pages! Love it. I can't wait to cut wood letters for titles!

Framed With Love stamp set (item #114389).
Photobucket
Since Frames with a Flourish was discontinued I need a new set with great frames and this set is just perfect!

I Heart Lists (item #116473)
I do. I realy do. I LOVE my lists and I love this set!
Photobucket
The little calendar srtip of months and numbers have so many possibilities. The lines with bullets would fit perfectly on a Post-it note and would be great for journal spots in a scrapbook page. Fun stuff!

And one more for this time (because seriously I'd love one of everything, lol)...

Favorite Things (item #115436)
Photobucket
Goes perfectly with the I Heart Lists set! The cute label fits the new Modern Label punch (item #116630)...love that. Another great stamp for a journal spot.

So there you go, a few items I can't wait to get my hands on! I'd love to hear what's on your wish list. I'm also including a printable wish list for you to print out so you can jot down your wishes. Click here - Wish Lists.

Until next time...

Tuesday, July 14, 2009

More Watermelons...

Another watermelon themed post. My sister is looking for watermelon themed invites that are cute, simple, and quick to make for my nephew's birthday. I discovered I have not one invitation stamp set! I will be ordering Introducing (114443) as soon as possible. At only $15.95 it's just right for all invitation, baby announcement, and wedding announcement needs.

Photobucket

Here are a couple examples I played around with today.

Photobucket

The square card is a 3"x3" square card. You can make any size square, this is just a quick example of an idea bouncing around in my head.

I really like how the scallop half circle card turned out. This card is super easy to create using Circle Scissors Plus (112530) and the Big Shot Circle Scallop die (113468).

I used one of my all time favorite background stamps Polka Dot (on the dormant list but still available to purchase-109276) on the Riding Hood Red cardstock to give it a watermelon-y feel.

If you have any cute watermelon themed ideas I'd love to see them. Just post a link in the comments.

Thanks for dropping by.

Monday, July 13, 2009

Make & Take Monday

At an attempt to be more diligent in my blog posting and to share with you more than just my scrapbooking I thought I'd start a new posting schedule.

Mondays are now Make & Take Monday when I share a project with you including all the how to's so you can make it along with me.

Now on to my first official Make & Take Monday post.

My sister is planning my nephew's 1st birthday party and decided on a watermelon theme. Now I am seeing watermelons everywhere as I help search for cute ideas to share with my sister. I found this super easy triangle box on splitcoast.com and immediately thought watermelon slice, LOL! Usually the box lays flat but I turned it to the side to make it look more like a slice of watermelon.

Photobucket

You can make these boxes many different sizes. Just keep the length of your cardstock two times the width (4" x 8" or 5" x 10" and so on).
I used a 3" x 6" piece of Riding Hood Red cardstock to create mine today.

1) After you cut your paper to size, mark the centers of the skinny ends with pencil.

Photobucket

2) Score your cardstock in the center of the wide side.

3) Line up the mark you made on one of the short sides with the middle of wide side then score to create a diagonal score line.

Photobucket

4) Line up the mark on the short side with the middle of the wide side again and score to create a triangle.


Photobucket

5) Do this again on the other side.

Photobucket

6) On scored lines fold in half and then fold in the flaps. If you plan to stamp on your box it is better to stamp before folding the box. I stamped sweet in Basic Black ink on my box.

7) Add adhesive to the edge of one of the small flaps and seal the two flaps together.

Photobucket

8) On the other set of flaps punch a hole so ribbon can be pulled through and tied to keep closed.

9) Fill your box with goodies then thread the ribbon through and tie closed.

10) Now it's time to decorate!

I wanted to create a rind for my watermelon slice. So I cut 2 strips of Whisper White cardstock and sponged one edge with Pretty in Pink ink (101301) and on the other side I sponged the edge with Certainly Celery ink (105217).

Next I punched the smallest hearts from Basic Black cardstock using the Heart to Heart punch (113694). I had planned to cut the hearts in half creating seeds, which you can do, but I ended up liking the full hearts.

Photobucket

I think it turned out pretty darn cute! What do you think?

I hope you enjoyed. If you create a triangle box I'd love to see all the different ways you decorated yours. Just post the link to a picture of your creation in the comments.

Thanks for visiting!

Workshop Fun

We had a fun at my last workshop.

The hostess had asked about craft ink and sticky sheets so I planned our projects with those products in mind.

First I demonstrated how to use craft ink on fabric. We made this adorable shirt using the Tart and Tangy set (111514). The word sweet is from an old Sale-a-bration set from 2007 but I though it went well with the fruit.

Photobucket

Then I demonstrated how to use Sticky Pages (114300). We used the Big Shot and the Stars #2 die to cut a star, then we put the star on the lid of the container and covered it in glitter to make it sparkly.

Photobucket

Then for our make and take we all made this cute card that looks like a popsicle.

Photobucket

Thanks to Jodi for hosting! Let me know if you'd like to host a Stampin' up workshop or join my Stamp Club and you can have fun creating Stampin' Up projects too.

Friday, July 3, 2009

Cute Cookie

Photobucket
I made these super easy fortune cookies along with a mini Chinese take out box last night. I usually don't like to share my cookies but I was excited to share these with you.

Here's a template for the mini Chinese take out box.
Photobucket

Just print at a full 8.5 x 11 inches. You can even print directly on your 8.5 x 11" pattern paper or trim down 12 x 12" paper.

I made mine using Whisper White cardstock and then covered the box with different pattern papers from the Designer Series paper pack Razzleberry Lemonade(115675). This is my first attempt and it is a little messy but I learned from my mistakes and the next one should go together a little easier.

How to make the cute little fortune cookies-

Seriously WAY easy...

1) Cut a 3.5" circle out of the paper of your choice. I used more of the Designer Series paper from the new Razzleberry Lemonade paper pack(115675). { Circle Scissor Plus(1125390) is perfect for this! You get a perfect circle in seconds - everytime!}

2) Hold two ends together. Don't crease, just hold the ends together like a taco, sort of.

Photobucket

3) Then fold the other two ends together slowly.

Photobucket

4) Put a dab of adhesive in the middle of the fold.

Ta-da...cuteness!

If you want to add a sentiment or a little hand written note use a strip of paper about 6.5" long and 1/4" wide. I used Happy Birthday from the Fundamental Phrases set(114968). Stamping or writing is easier when done first then cut to size. Slide the strip through the taco fold before pinching together.

Photobucket

I trimmed the ends of my strip into a 'v' and then curled the paper a little to add character.

These would be great as the gift tag for a gift wrapped in a Chinese take out box.

You could revamp the coupon book idea. Make a bunch of the little guys then fill them with "coupon" strips.

Cute party invites or party favors or party decorations....I could go on and on.


If you make some of these email a pic or link a photo in the comments. I'd love to see them and share your ideas and inspiration with everyone.

Have a wonderful Independence Day weekend!!

Wednesday, July 1, 2009

All New...

The new catalog is finally here!!

{Click here to veiw it online}

Photobucket

If you would like a catalog send me an email.

There is also a new Definitely Decorative catalog.
{Click here to download}

Photobucket

Love the front cover. That dandelion is gorgeous. The catalog is full of wonderful ways to use the vinyl and stencils. I can't wait to get my hands on some of these!

I'm excited for the new Deal of the Week through Stampin' Up during the month of July.

Scroll down to the previous post to see what the deal is this week!

Enjoy perusing the new catalog!

Deal of the Week

I'm excited for the new Deal of the Week through Stampin' Up during the month of July.

This week -

Photobucket

July 1–5, get the Scallop Edge punch for just $10.99—over 30% off the regular price of $15.95! What an awesome deal! You only have until the 5th to take advantage of this order. Send me an email and I can get it ordered for you.

If you don't have one of these now is the time to buy! I use mine ALL.THE.TIME! Just scroll through my posts and you'll see it on almost every project.

Photobucket

The new catalog went live today at noon! More info and links to the cataog online soon!

LinkWithin

Related Posts with Thumbnails
Disclaimer: The content in this blog is the sole responsibility of Rachel Ricks as an independent Stampin' Up! demonstrator and the use of and content of classes, services or products offered is not endorsed by Stampin' Up!

All content, including text, photographs, and concept design works, are ©Rachel Ricks. They are shared for personal/ non-commercial use and inspiration only.

Blog header and logo design © Rachel Ricks.

flash backs